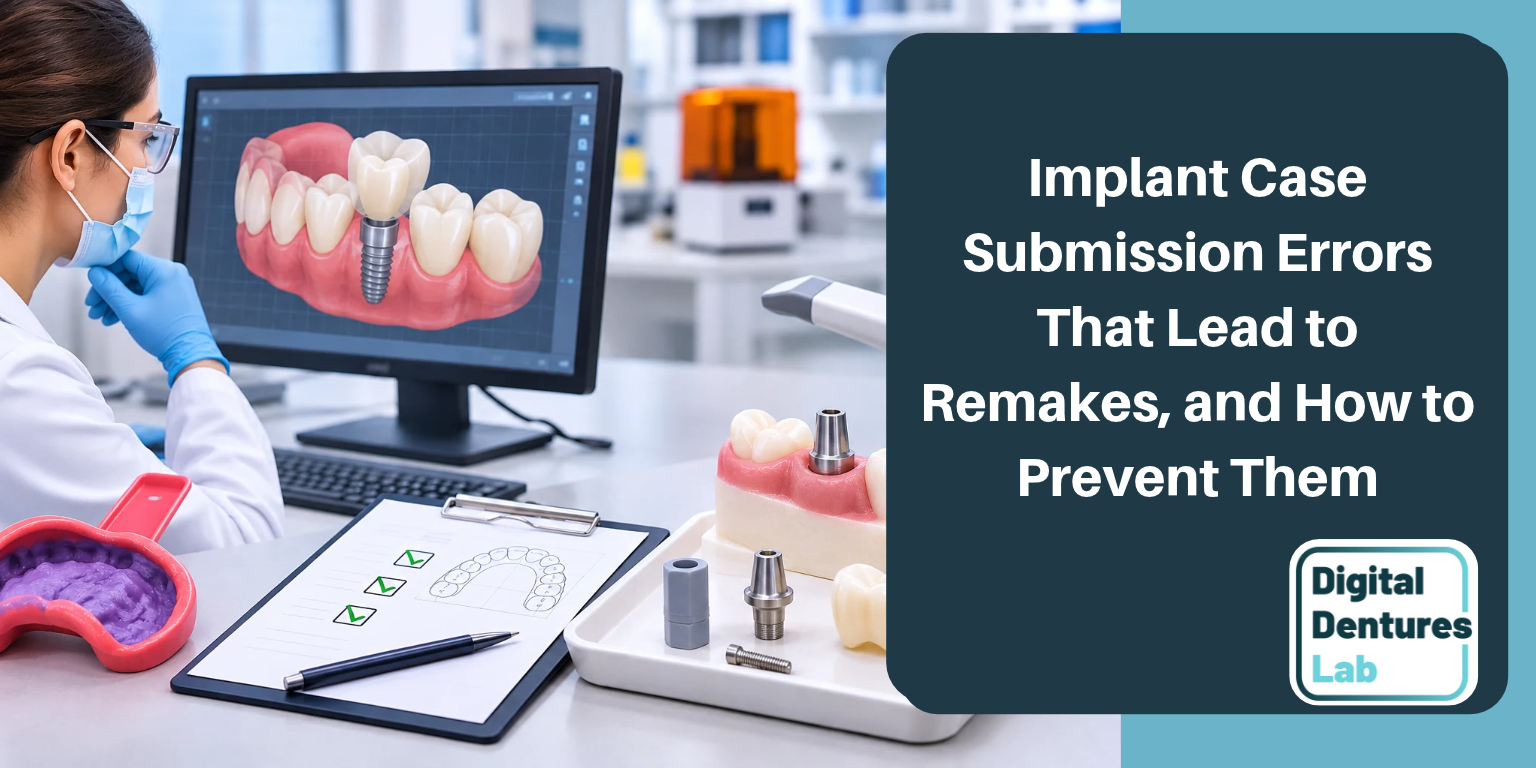



An implant restoration gives a dental implant lab little room to compensate for missing or inaccurate positional data. Unlike a prepared tooth, an implant connection cannot be identified from surrounding anatomy alone. The lab can design only from the records it receives, and a problem at capture can appear later as an abutment that does not seat, an altered contact, or a remake.
A case submission is more than a scan or impression. Whether the practice captures the case digitally or makes a conventional impression of implant position, the submission also includes an accurate implant scan body or impression coping record, an opposing arch, a bite registration, photographs when indicated, and a complete prescription. Many preventable problems begin with records that could have been checked chairside. Laboratory design or manufacturing errors can also contribute. These six common submission errors are worth looking for before the patient leaves.
A prepared tooth presents visible margins, cusps, and neighboring contours. For implants, the restorative position comes primarily from the geometry of a seated scan body or, with a conventional technique, a correctly connected impression coping. The scanner records that reference; the laboratory software matches it with the corresponding implant library. If the reference is wrong, the digital model may look complete while describing the wrong position.
The error then follows the case. Abutment seating, anti-rotational alignment, proximal contacts, and occlusal relationships may be affected. Across a complete arch, errors in recording multiple positions can compound. Recent clinical evidence on full-arch scanning emphasizes that accuracy depends on the technique and the reference geometry - not simply the resolution of a scanner. An implant scan body is a measurement component, not a substitute for checking the interface.
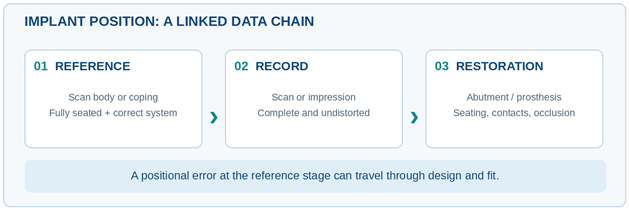
The positional reference is the starting point for the downstream restorative design.
Even a small seating gap can shift the represented implant platform. Soft tissue, debris, a mismatched component, or incomplete engagement may leave the implant scan body or impression coping sitting high or rotated. The resulting dental implant impression can look convincing while recording a position that the restoration cannot reproduce.
Prevention: Check the component and connection, verify stable, complete seating clinically, and follow the manufacturer’s attachment instructions. When seating remains uncertain, a radiograph may be appropriate before capture. The decision depends on the clinical situation; routine radiographs should not be implied for every scan. A prosthodontic review specifically addresses clinical seating checks and selective radiographic verification.
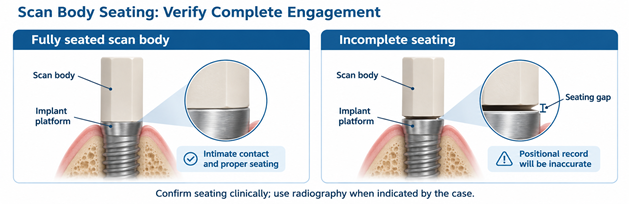
Full seating versus a possible seating gap (conceptual illustration, not to scale).
Missing facets of a scan body, movement during capture, and stitching gaps leave the software with incomplete reference data. In a conventional impression, voids, distortion, or a displaced coping can create comparable uncertainty. More data are not necessarily better if the critical surfaces are inaccurate.
Prevention: Stabilize the field and capture the implant site deliberately before extending the scan to adjacent teeth and the remaining arch, within the scanner manufacturer’s protocol. Rotate the digital model and inspect every required scan-body surface. If an area is deficient, repeat the affected capture while the patient is present; in full-arch cases, follow the scanner and laboratory verification protocol rather than assuming a local patch will correct accumulated stitching error.
Peri-implant tissue can change after a healing component is removed, and blood or saliva can obscure the interface or introduce scan artifacts. The positional record may be readable, yet the emergence profile or tissue margins may be less useful for the intended restoration.
Prevention: Have the scanner or impression materials ready before removing the healing abutment. Connect the correct component promptly, manage moisture and bleeding, and record the tissue contour needed for the design. If the site cannot be captured reliably, address the field first rather than accepting a compromised file.
An otherwise good implant scan does not establish the opposing occlusion. Missing antagonists or a distorted interocclusal record leave the lab without enough information to evaluate contact distribution and available restorative space. The result may be an occlusal discrepancy, unexpected adjustment, or the need for new records—not necessarily a failure of the implant position itself.
Prevention: Inspect the opposing-arch scan or impression and verify the bite record in the intended jaw relationship. Check that the file includes usable anatomy on both sides of the planned restoration. Digital Dentures Lab lists opposing-arch information and bite records in its implant submission guidance.
Implant manufacturer alone is not enough when systems have different platforms, connections, and component generations. The dental implant lab also needs the prescribed prosthesis, implant position, restoration type, shade, and any specific abutment or attachment instructions. Photographs may help where esthetic contours or soft tissue are important.
Prevention: Complete the Digital Dentures Lab prescription form for every case. Identify manufacturer, platform/connection, component details, tooth or arch, provisional versus final status, shade, and the intended design. Confirm an unfamiliar interface with the lab rather than guessing from an image of the implant.
“Implant denture” is not a complete case description. A removable snap-in prosthesis, a fixed implant denture, and an All-on-X restoration have different attachment, space, and design requirements. The lab also needs to know whether it is creating a provisional restoration, a verification component, or the final prosthesis.
Prevention: State the case type and treatment phase prominently. For a first digital submission, ask which scanners, export formats, implant libraries, and supporting files Digital Dentures Lab accepts. The lab’s FAQ on intraoral scans advises confirming compatibility and accepted formats before sending an initial case. Do not assume that an STL file alone always carries everything required for a specific implant system.
The most useful checklist is short enough to become part of the assistant’s routine rather than a separate administrative task. Assign one person to check the capture and another, when practical, to verify the prescription. Keep the patient in the chair until the critical records have been reviewed.
Before capture - Confirm tissue access, field control, the correct scan body or coping, and complete component seating.
During capture - Record the implant site and the required neighboring surfaces according to the scanner protocol; inspect the conventional impression before it is removed from the workflow.
Before the patient leaves - Review the digital model from several angles, verify opposing anatomy and bite, and repeat deficient capture while corrections are still convenient.
Before sending - Confirm the prescription, implant identifiers, photographs if needed, and the intended case type and phase.
Assign ownership - Identify the dentist or trained team member responsible for the final submission check and for responding to laboratory questions.
That small pause is often less disruptive than bringing the patient back solely to replace a missing record. It also gives the laboratory a clear point of contact if something is still unclear.
A responsible laboratory should not guess at a critical implant interface or an undocumented bite. It should ask for clarification, request corrected files, or identify whether a fresh impression or verification record is needed. Every extra exchange introduces another opportunity for misunderstanding and may affect the practice’s scheduling.
Digital design approval is valuable, but it is a second check. It allows the dentist to assess proposed contours, tooth arrangement, restorative space, and other visible design decisions before manufacturing. It cannot make an incorrectly seated scan body accurate. Nor does a complete submission rule out laboratory-side errors in component selection, CAD setup, manufacturing, or finishing. When fit problems occur, the practice and lab need to examine both parts of the workflow.
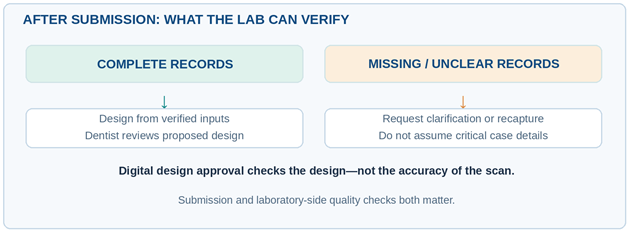
Complete inputs support an informed design review; missing inputs call for clarification or recapture.
A useful dental prosthesis laboratory publishes its submission requirements, accepts a workflow the practice can use, has a clear design-review stage, and can answer component and file questions before fabrication. Responsiveness matters most when the case is unusual or a record does not match the prescription.
Digital Dentures Lab accepts intraoral scans and conventional impressions through a secure online submission workflow, with digital design previews for dentist approval before manufacturing. Its published implant services include snap-in dentures, fixed implant dentures, All-on-X prostheses, custom abutments, and bars. The lab lists support for Nobel Biocare, Straumann, BioHorizons, Zimmer, and Hiossen implant systems. Practices should still confirm the exact platform and component combination for each case.
Digital Dentures Lab also publishes free two-day FedEx shipping and provides Boise-based support. Those are operational features; they do not replace a suitable treatment plan or verified records. Diagnosis, implant selection and placement, prosthetic design decisions, and final clinical approval remain the dentist’s responsibility. The broader digital fabrication workflow can help practices understand where standardized case records fit into everyday scheduling.
An avoidable implant remake often starts as a small communication or capture gap, not a failure of digital technology. Confirm the reference component, inspect the records, identify the planned restoration, and send a prescription that leaves no critical question open. A laboratory that checks its own work and communicates promptly completes the process.
Submit Your Next Implant Case to Digital Dentures Lab
Review the requirements on the Implant Solutions page, complete the online RX form, and confirm unfamiliar components or file formats before submitting. Digital Dentures Lab includes free two-day FedEx shipping and U.S.-based case support. Confirm scheduling details for the individual case before making a delivery appointment.
Send the prescription, manufacturer and platform/connection information, the scan or impression, opposing arch, bite record, shade, and specific design instructions. Add photos, component records, or verification data when the case requires them.
Possible causes include an incompletely seated scan body or coping, distorted capture, the wrong component library, an inaccurate cast or digital model, and laboratory design or manufacturing discrepancies. Diagnose the source before remaking the restoration.
A conventional intraoral digital implant scan generally requires a compatible scan body or another validated position-recording technique. The correct component and workflow depend on the implant system, scanner, and intended restoration.
Yes. Digital Dentures Lab accepts both, provided the impression technique, copings, records, and prescription are appropriate for the restoration. The dentist should confirm any case-specific verification requirements.
Contact Digital Dentures Lab with the scanner model, intended export format, implant system, and restorative indication. Ask which libraries and files are needed, and check the submission route before capturing the patient.

Get updates, case details, and lab innovations to support your practice and patient outcomes.